I have been working on tote bags and want to record my construction method before I forget. In case you get confused, the photos below were done making two different bags. For my next bags, I need to learn to install zippers (in the pockets or for a closure).
First, here are photos of both sides of the completed bags:
 |
| My Sister's Bag |
 |
| My Sister's Bag |
 |
| My bag |
 |
| My bag |
Now, what I did I can explain in a few steps.
(1) I started with two completed patchwork squares
(2) I added a trim color on sides and connected the two squares
(3) Made straps (optional)
(4) Added lining (with pockets)
(5) Added firm base (optional)
(6) Sewed together
Now, here is my detail, starting with step 2.
 |
| I have added the sides and a panel for the bottom |
 |
| Trimming it all up even |
|
|
I now have one large panel for making the bag:
 |
| One Panel for the bag |
Now, come the straps. If I am making them, I start with 2.5 inch strips. They can be sewn down one side and then turned right-side out or be made by pressing both sides in and stiching up (multiple times, if desired). A few times my straps were not really firm enough. I need to consider what is the best type of fabric or if the fabric should be doubled.
 |
| iron the folds and then fold together |
 |
| note foot placement |
 |
| Adding more rows |
 |
| The two straps are ready |
|
|
Now to make the pockets. I have had best results by making a panel, sewing down the top and bottom raw sides, and then stitching onto a piece of fabric which will be the lining. The width is oversize and is later incorporated into the body of the bag. The lining fabric also is a little wider than the bag and the length is about the length of the finished bag. I do this for each side.
 | | | |
| Completed pocket square |
|
|
|
|
Lay the straps on each side of the top sides of the bag and pin in place.
 |
| Take care that the straps are not twisted as in this photo. |
|
|
Place a lining square level with the top (the straps are in the middle) and sew in place.
 | |
| The bag, lining, and straps are ready to be stitched along the top. |
Turn right side out and iron each side carefully.
 |
| Both tops are now complete |
Turn inside out and match up the sides carefully, so that the final top seams will line up.
 | | | |
| Be careful to match exactly |
|
|
 | | | | | | | | |
| For added accuracy, I stitch together in two steps. Each time from the center. |
|
|
|
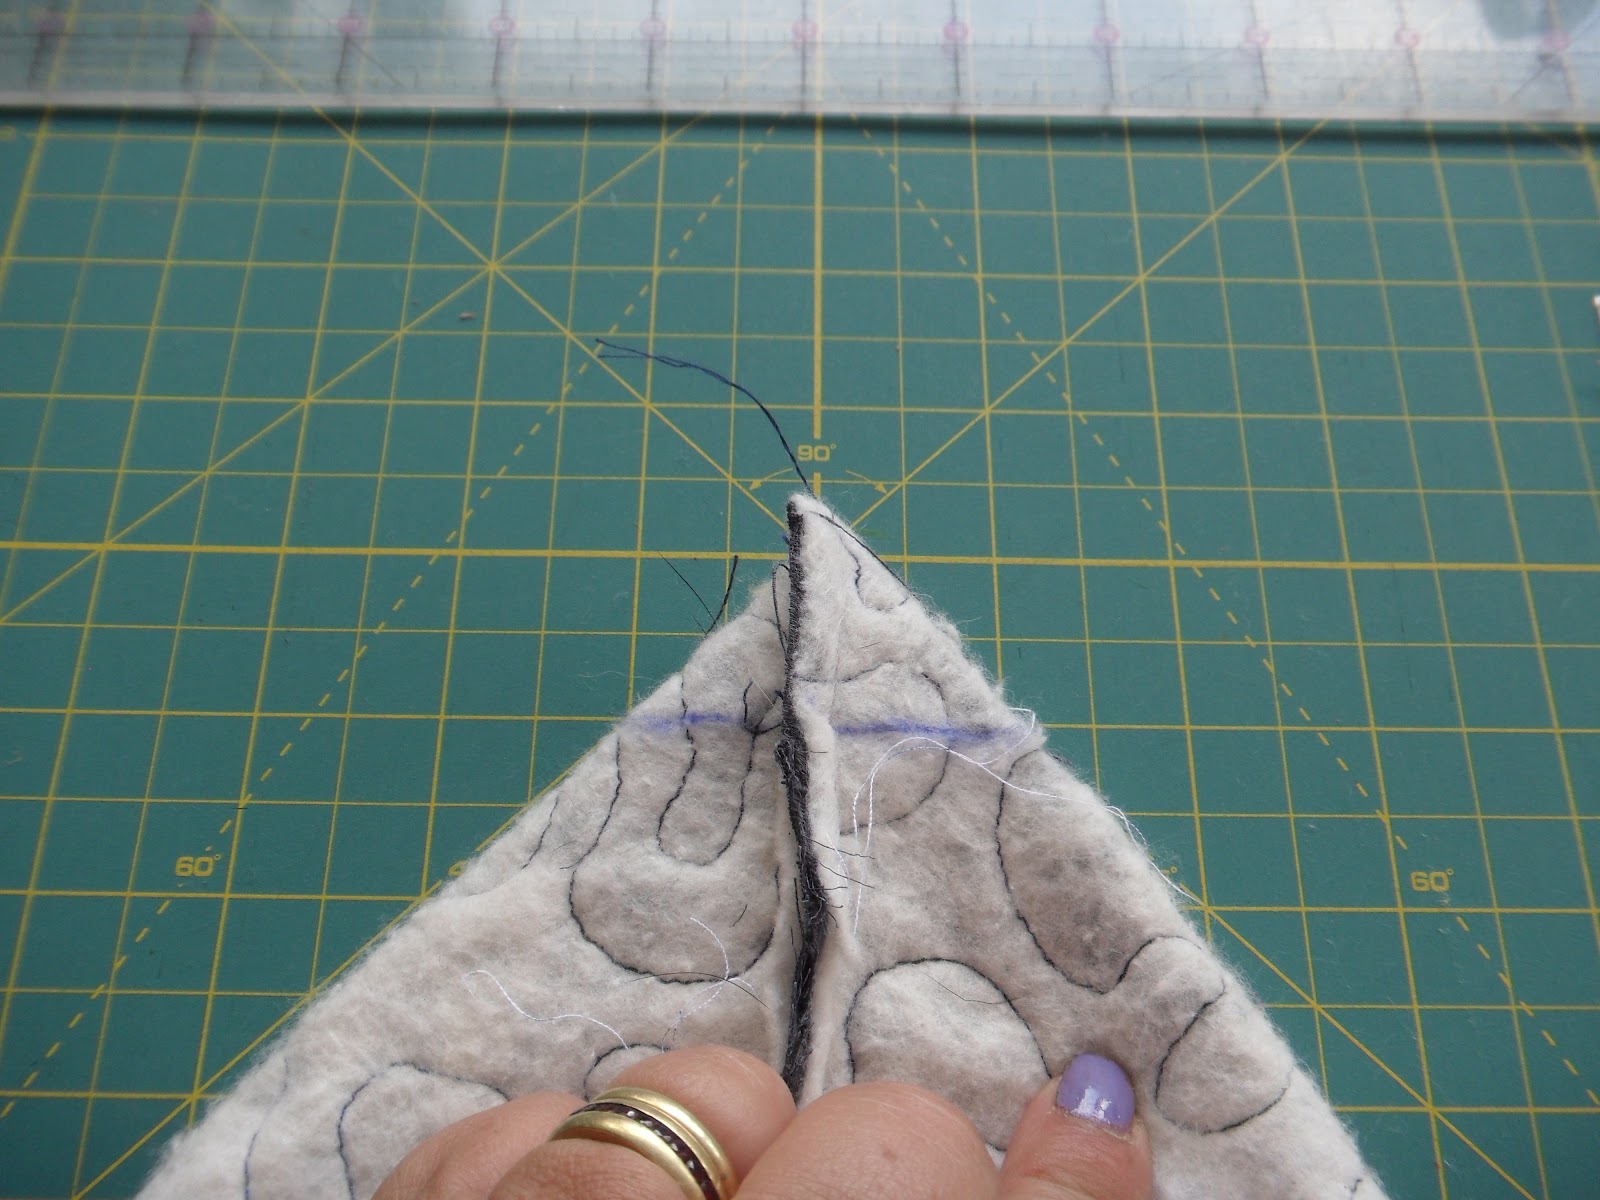
Now, you need to make the bottom of the bag square. From each corner, fold the fabric and mark a two inch sewing guide.
 |
| Note that the line is drawn where the width is 2 inches |
 |
| This provides a final bottom box of 2 inches. |
|
|
|
|
|
The last step is to pull the lining out of the bag and sew the bottom closed.